![ovex-logo-white-1.png]](https://support.ovex.io/hs-fs/hubfs/ovex-logo-white-1.png?height=40&name=ovex-logo-white-1.png)
How to create an organization and manage your users
Creating an organization allows you to invite sub-users, who can be granted different roles to fulfill actions on your behalf
Creating an organization
In order to create an organization, you need to meet the following criteria:
- You need to have completed your KYC and onboarding documentation and they have been approved by a compliance officer.
- Your account needs to be a corporate account. An individual account is not able to create an organization
To create your organization, click on your profile icon on the top right of the screen and select Profile & Settings.
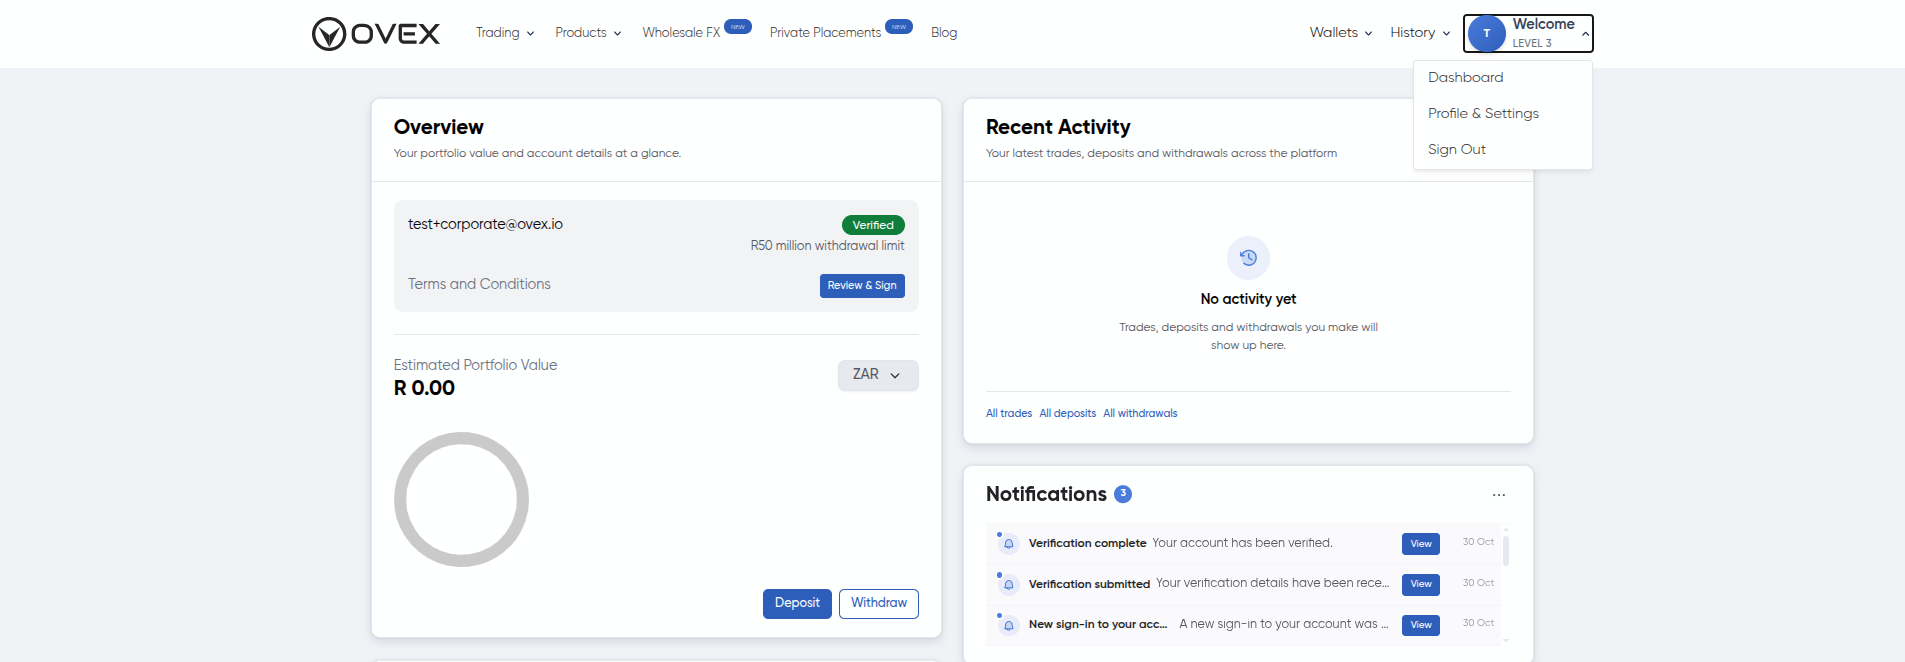
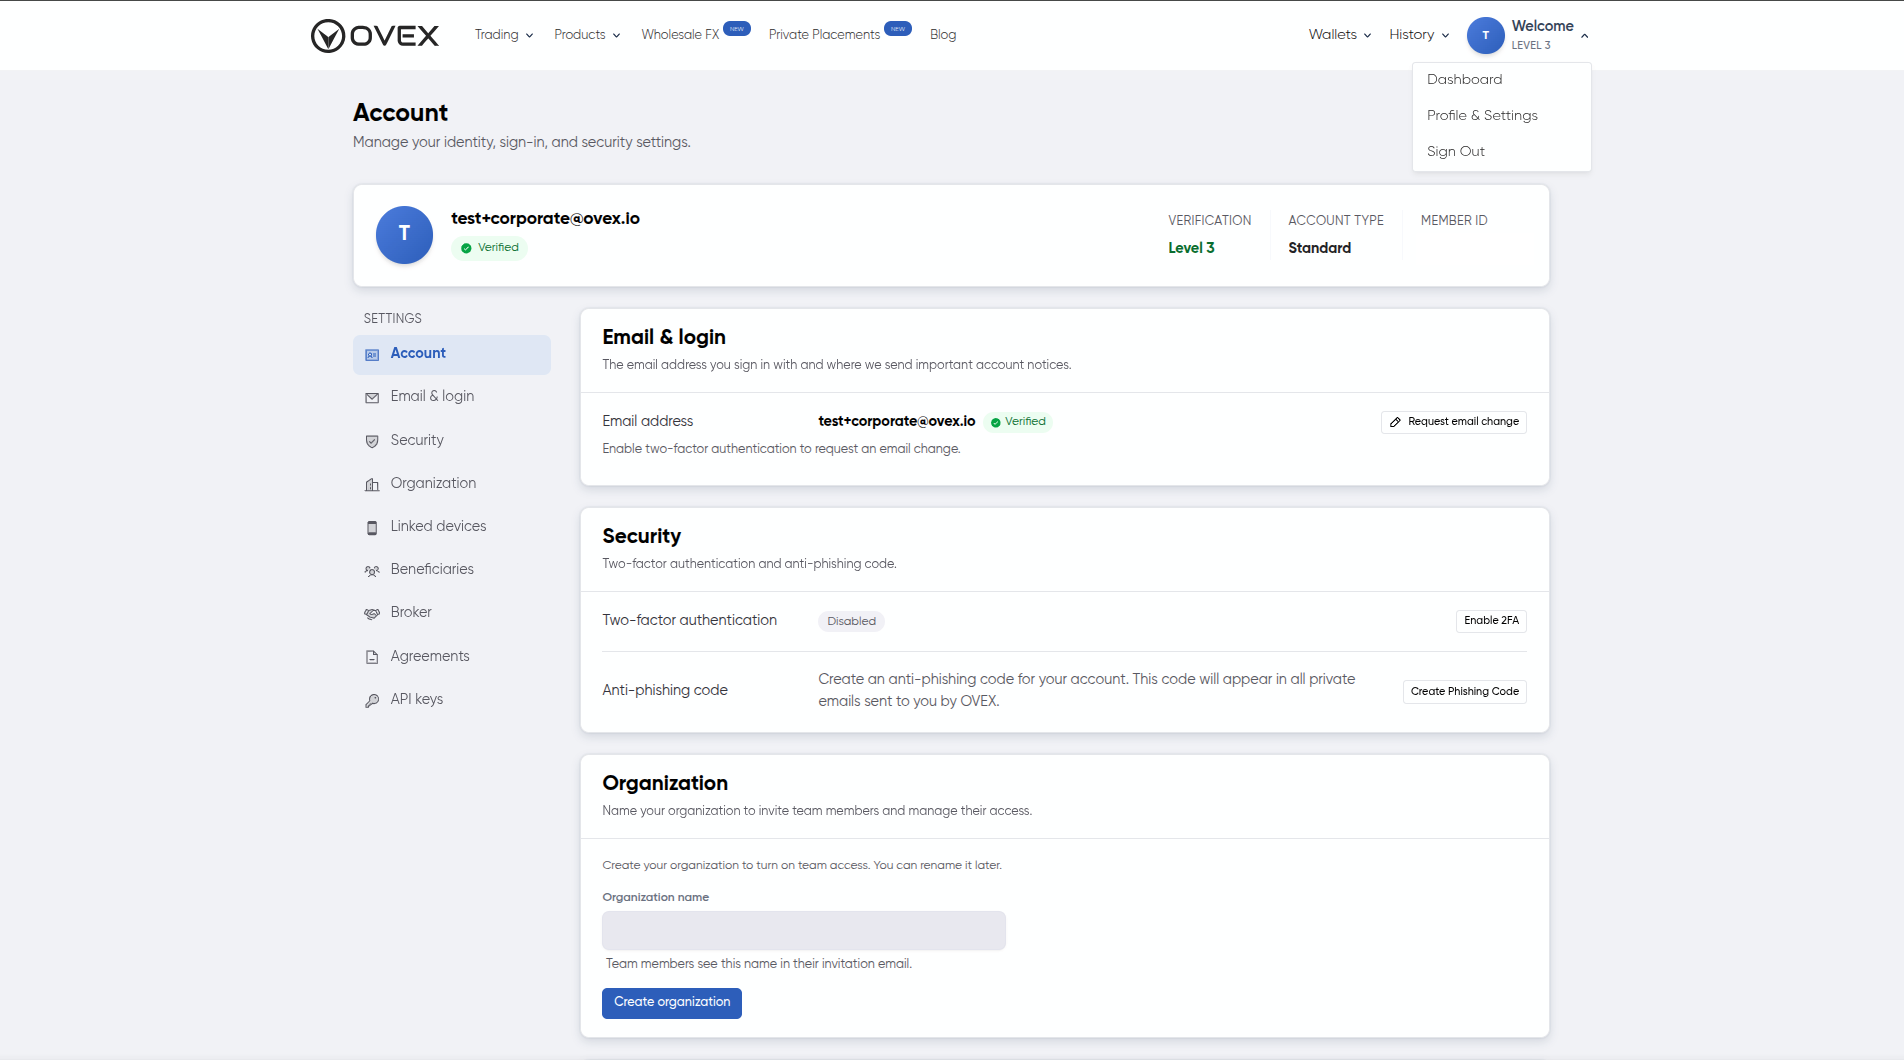
Scroll down until you find the section for Organization. Here you can select the name for your organization and click “Create organization”.
Managing users
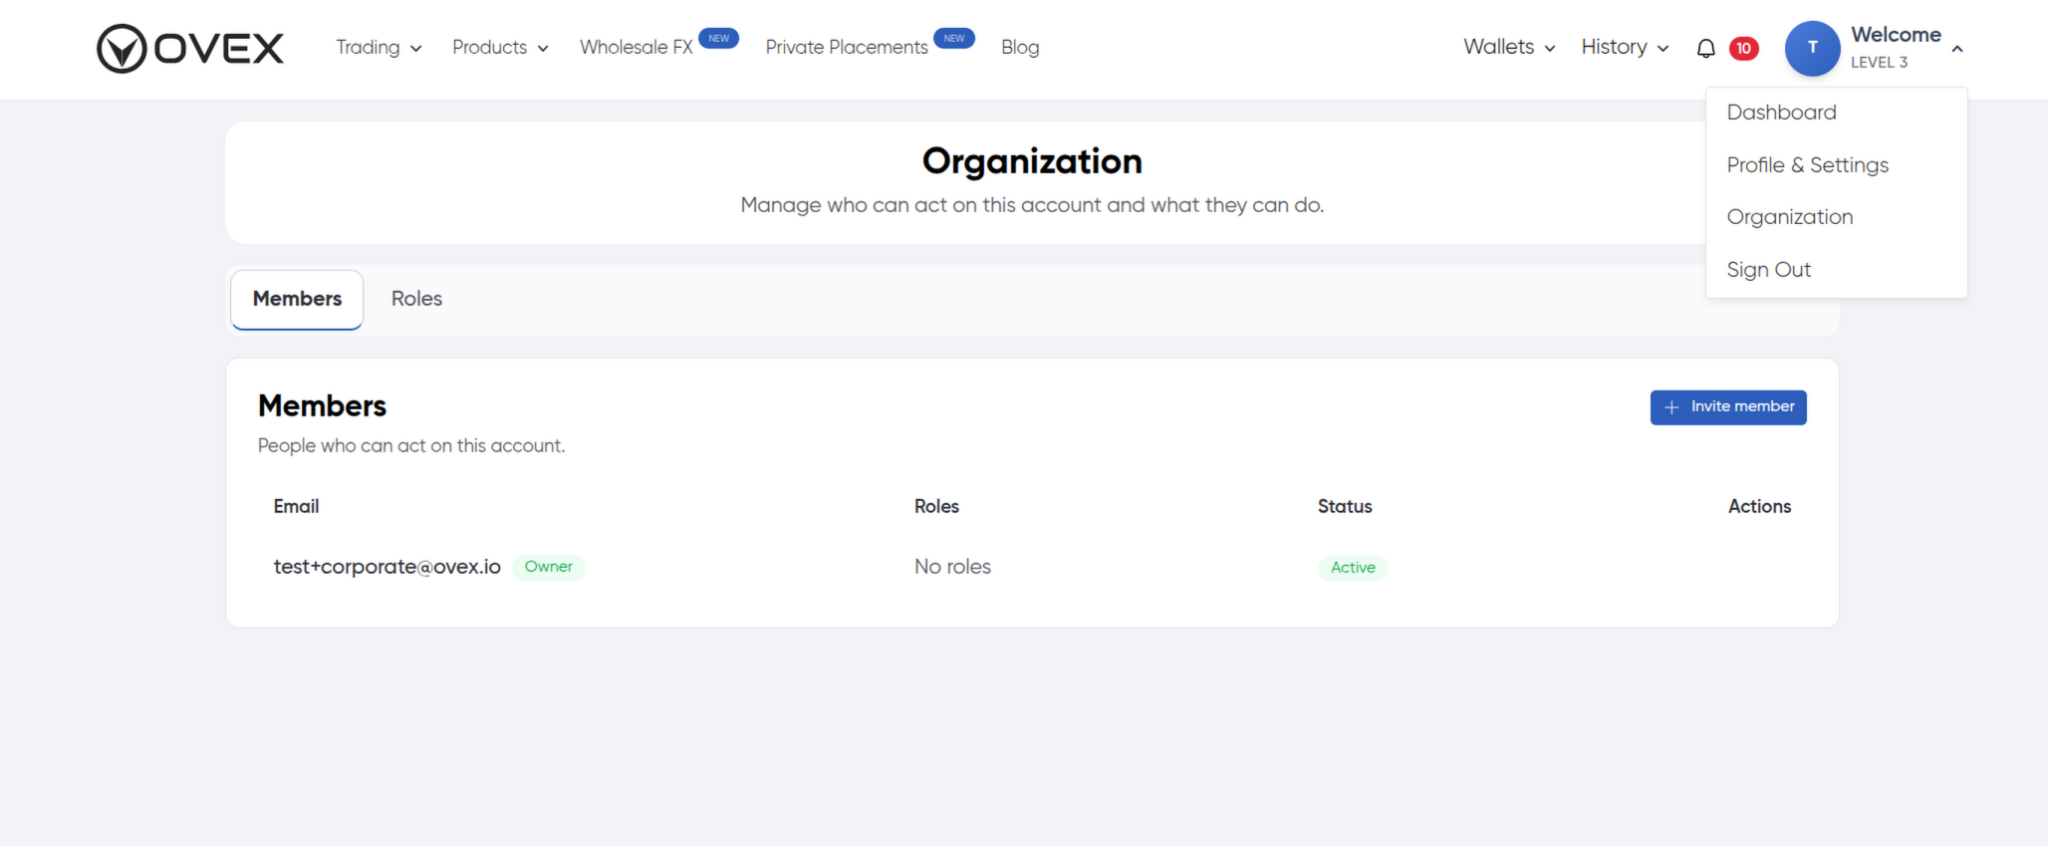
Once you have created an organization, you will find the Team section available in the dropdown menu by clicking on your profile icon. Within this section, you are able to invite users, edit their roles, remove and reinstate previously removed users.
Invite users and managing roles
To add sub-users to your organization, click on the “Invite member” button. You can input an email address here to invite someone to your organization. They will need to accept the invite within 3 days or the invite will expire. Accepting the invite directs them to a page to create a password for their account to be able to sign in. Once the password has been created, the user can sign in on the site and will be a member within your organization.
NB! In order to invite a user to your organization, they cannot have signed up with their own Ovex profile. If they have, they will be unable to be invited as a sub-user to your organization. Additionally, they cannot already belong to another organization.
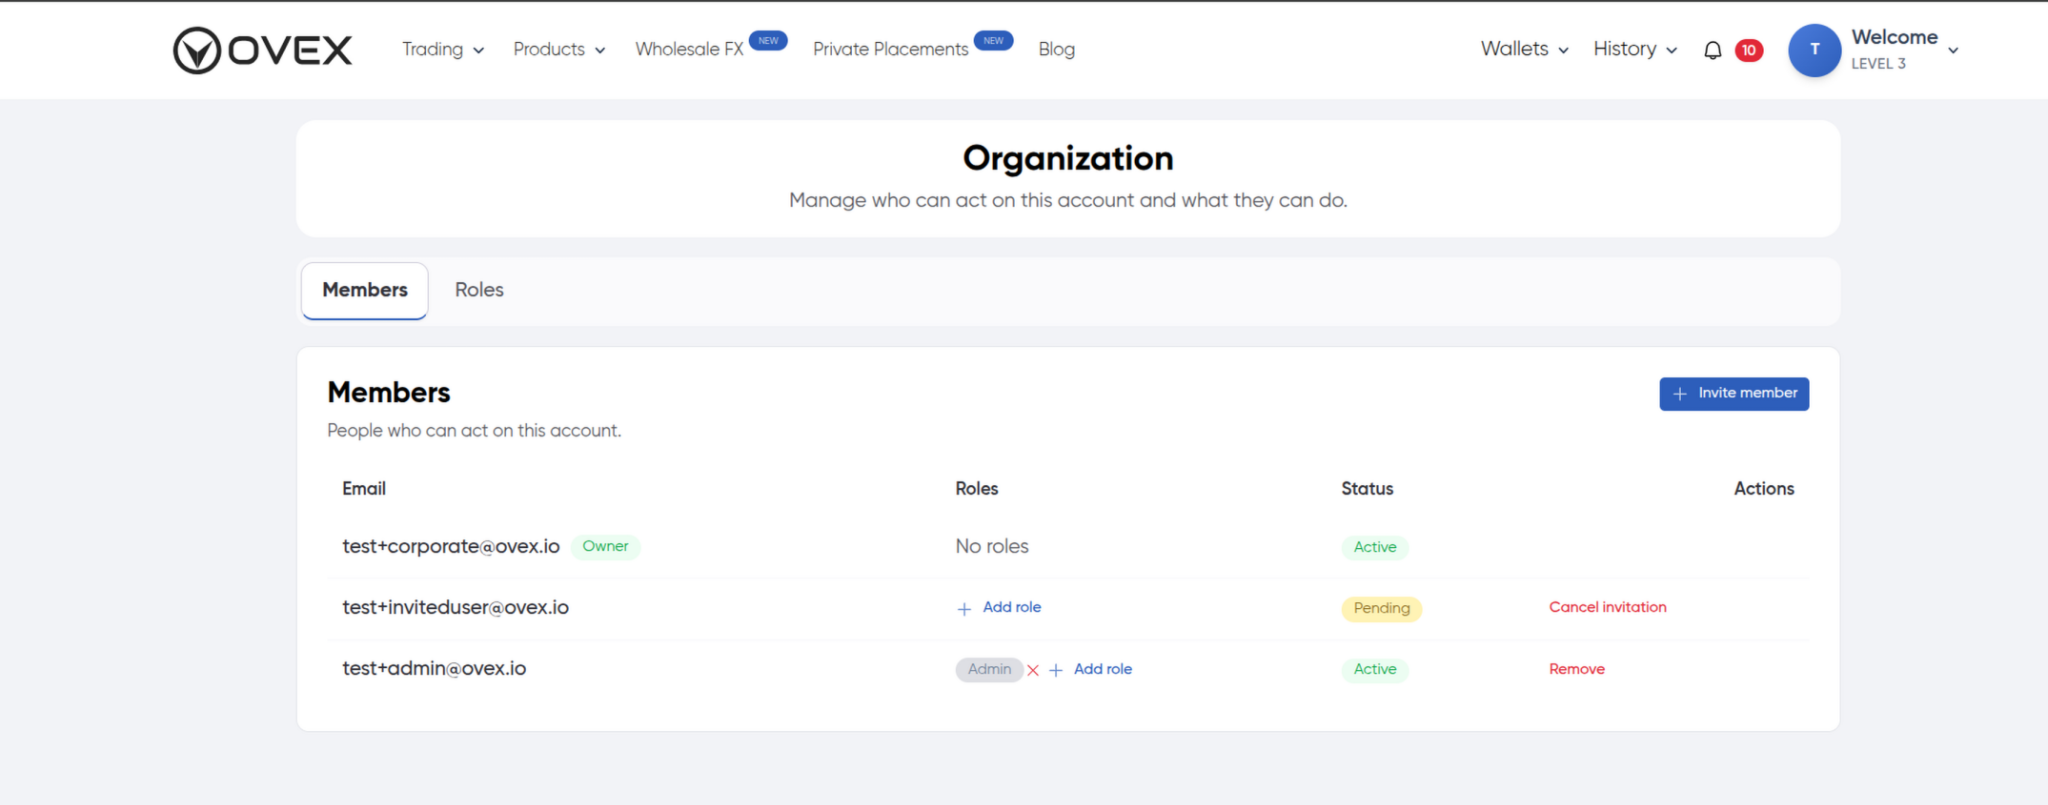
Once a user has accepted the invite, you will see their status change from pending to Active. As an organization owner will be able to assign a role to the invited user by clicking on the “+ Add role” next to their name. In the pop up window, you will be able to select one of the default roles or one of your custom roles if you have created one, to assign it to the user.
You are also able to remove and add different roles from your users. Aside from the owner, a member of an organization with the admin role is also able to invite, remove and change the roles of the other non-admin users within the organization.